How to Compress a Picture for Email, Website or Avatar
Photos can take up a lot of space on your hard drive or in your phone memory, but you will face much more troubles when you decide to share them online. The thing is the size of a picture can significantly slow down the load time of your webpage, and make you choose a different avatar as the first one is too large. If you upload an optimized photo, though, it will enable you to meet the file size requirements and reduce its load time. So how to compress a picture for web?
The easiest and most effective way is to use proper software. Home Photo Studio is an easy image editor that allows you to adapt the size of any chosen picture for the Internet. By resizing and compressing your JPEG, BMP or RAW images, you will significantly reduce their file size without quality loss. Keep on reading this guide and learn four simple steps of optimizing your photos.
Download your Home Photo Studio now!
Step 1 – Open the Photo You Wish to Compress
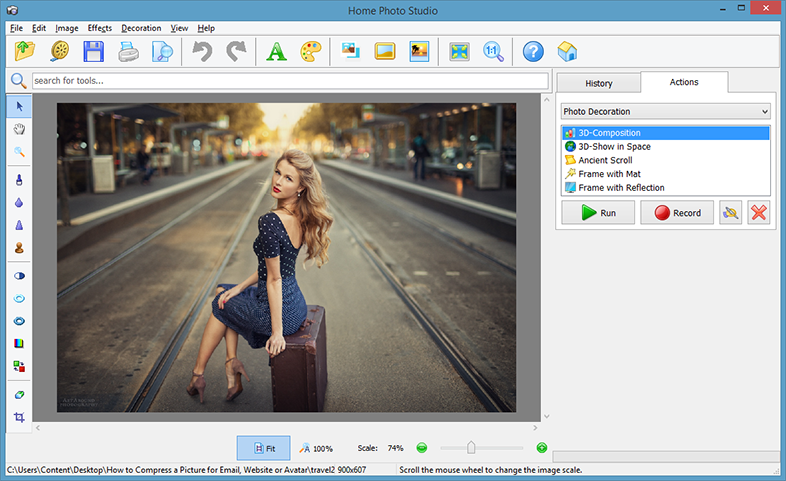
Before you start working with the application, make sure you choose an image without small details as they would probably be lost after compressing and smoothening. If you have already found a perfect picture for your webpage or avatar, you still need to shrink its size before uploading it to the Internet. Launch Home Photo Studio and add your image for further optimization. Click Save for Web – this will open a new program window providing all the possible compression features.
Step 2 – Use the Fixed Size Option
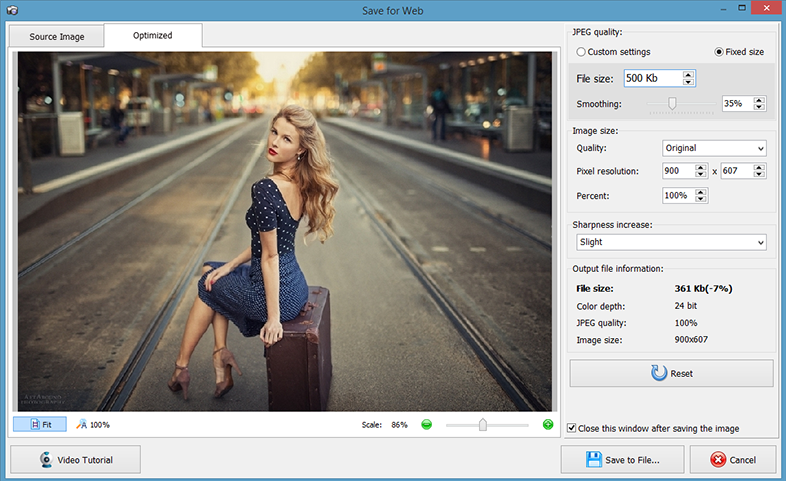
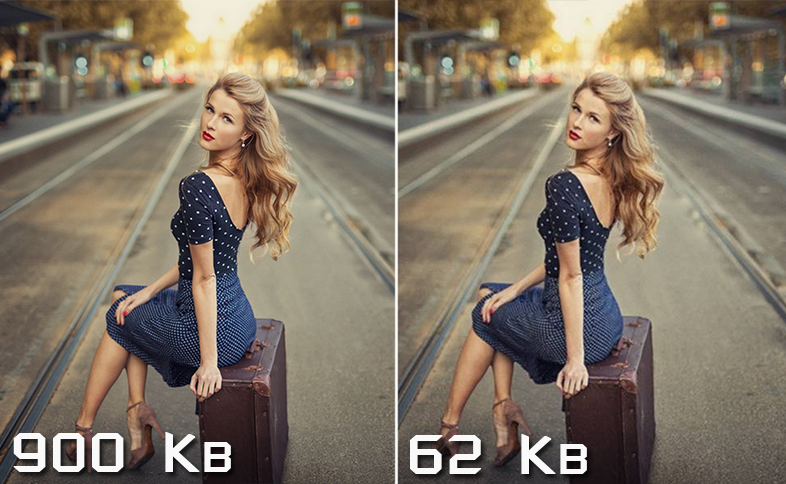
In case you are not sure how to change the quality of your picture by hand, you can specify the image compression rate using the Fixed size option. All you need to do is to set the desired file size in Kb to meet the requirements of the chosen website or social network. The application will automatically adapt the image quality to the changes you made, and smoothening will help you achieve a great result.
Step 3 – Play with Custom Compression Settings
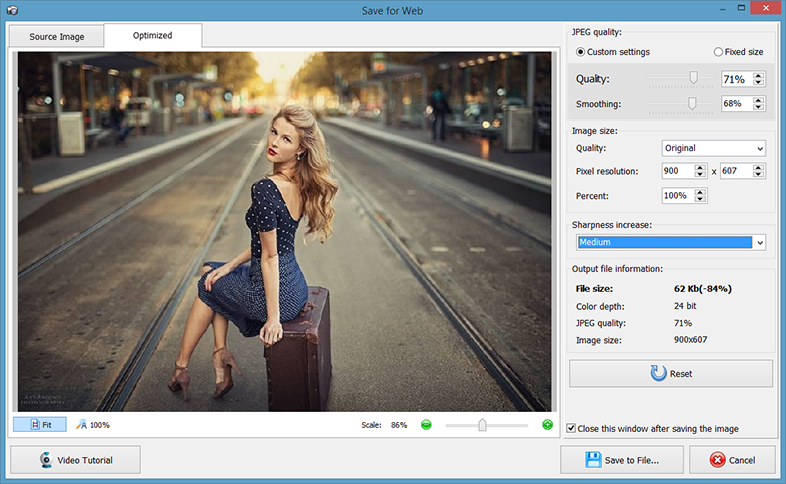
Custom settings are for those who already know how to compress a picture and want to fully control the process. Move the marker on the Quality bar to steadily reduce the file size in percentage. Additional tools will help you set the pixel resolution, and even sharpen the blurred areas of your image for a better effect. The app shows you output information such as image and size file, quality and color depth. If you are dissatisfied with the result, click Reset and bring back the original picture.
Step 4 – Save Your Optimized Image
When you have compressed your image, it is high time to save it in a proper file format and upload to the Internet. Switch between the Source Image and Optimized windows to see the difference between the initial picture and the one you have successfully compressed for the web. Click Save to File to finish your editing process and get a final picture of a proper size.
Now that you have learnt how to compress a picture for the web, discover the secrets of advanced photo editing that will make your pictures more eye-catching. For a start, try changing or blurring the background of your photos. Then remove red eyes that ruin a seemingly perfect portrait. Finally, retouch blemishes and other imperfections on the faces of your friends and family members captured on photos. With Home Photo Studio, it becomes easier than ever!
Download your Home Photo Studio now!
The program is compatible with Windows 11, 10, 8, 7